Welcome to Getting Started Guide!
This guide will walk you through the basics of MyLifeOrganized. Along the way you will discover in-depth customization capabilities to empower your planning system to new heights.

First steps: turn Planning into Doing
Organize and structure tasks
Some of your to-dos are quite obvious single actions, whereas the others are vague or too general. Either way, the very first and right action would be to place all tasks that came to your mind right into the planning area of MLO — unlimited Outline.
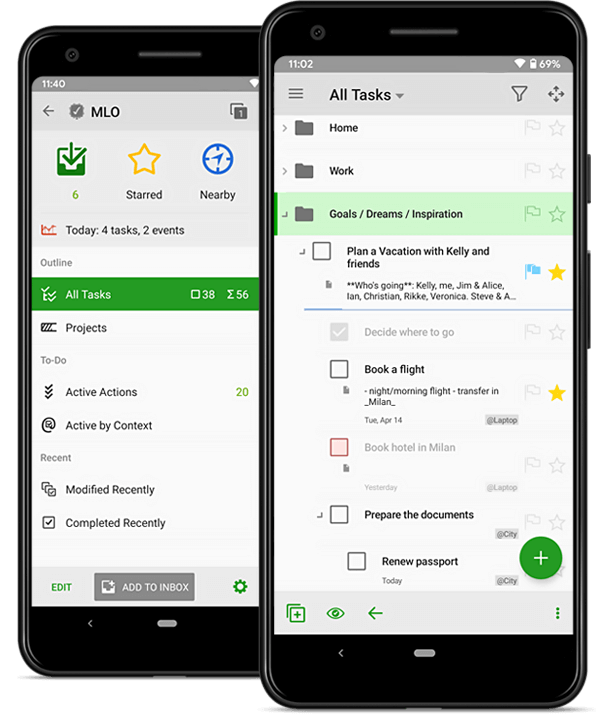
Outline
A file opened in MLO has two default tabs* on the top: Outline (planning) and To-Do (doing).
The Outline tab displays ALL your tasks. Here you can organize and structure them in a common list with unlimited hiearchy.
* If there are no Outline and To-Do tabs in your data file, open a new file with default settings: menu File → New → click arrow near New blank file → Select New blank file with default contexts, flags.
Tip. If you follow the GTD concept, use Inbox to capture all new stuff.
Add tasks
Big things are made up of small actions. For example, the big task "Plan a trip" consists of the subtask "Buy tickets". With hierarchy in Outline you can set parent and child tasks and clearly see how they are related to each other:
Tip. You can Drag&Drop tasks and also use arrows  on the toolbar for moving tasks.
Get a smart list of your To-Do actions. Auto-magically!
Once the planning is done, switch to the To-Do tab.
MLO takes all the stuff that you have entered, works it’s magic and tells you the tasks that you need to be doing now. In next chapters we explain how exactly this magic works.
To-Do
- displays a plain list
- pulls up Active tasks from the entire Outline. Active tasks are those which you can start working on right away. Such tasks are green-colored.
- is created and updated automatically, based on your input.
Tip. Refer to our help file to learn more about which tasks are considered Active.
Narrow your To-Do list even more
It is important to keep your To-Do realistic and not overwhelming. Tasks that you cannot do yet shouldn"t be in the list — MLO offers a variety of features to help you achieve this.
Get back to the Outline and check out the following options:
Zoom in
You can focus on one branch and hide the rest.
-
To zoom in select the parent task and click

-
To zoom out click the yellow pane or click

Tip. The Zoom in command in the first tab also affects other tabs if the option "Sync zoom with first tab" is enabled for them. Here you can learn more about tab customization.
Complete subtasks in order
Suppose, you have sequential tasks. You can make MLO show them one by one in To-Do. Just select the parent task and press AltP to turn on this task property.
Look how it works:
Add to dependency
Use Dependencies to hold tasks that can"t start until others are finished.
Explore other options
Collapse/Expand
-
Click
 to collapse the whole task hierarchy
-
Click
 to expand it.
Hide completed
-
Click
 to hide completed tasks.
- Click it again to show completed recently tasks.
- Then the next click reverts it back to the original position - all completed tasks shown.
Use Shortcuts
Ctrl + N – to add a new task
Ctrl + Shift + N or Ctrl + Ins – to add a new subtask
Ctrl + M – to move a task
Space – to mark the current task completed
Ctrl + R – to zoom into selected branch
Ctrl + Alt + R – to zoom out
F6 – to collapse the task tree
F7 – to expand the task tree
Ctrl + PgUp / PgDn – to switch to previous / next tab
Summary
At this stage MLO has helped you to:
- organize all your tasks the way you think, hierarchically, in Outline. Whenever you need to look at your big-picture plan, open it.
- automatically get a flat To-Do list which eliminates the clutter and lets you focus only on tasks you can actually do.
For your convenience Outline and To-Do are already opened in the tabs (workspaces) so you can quickly switch between them and work on different different parts of the same task list.
 to rearrange tasks.
 to rearrange tasks.
Quiz (select the correct answer)
- Which view displays tasks hierarchically?
- The view Active Actions displays:
- To make your tasks appear one by one in To-Do, you need turn on: